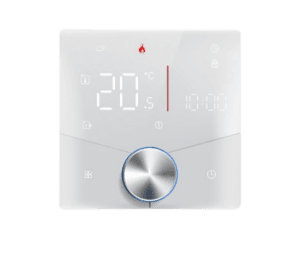
Over the past decade, the push for energy efficiency and sustainable living has propelled countless innovations in home energy management. At the forefront of these developments are smart meters, which offer real-time monitoring, better billing accuracy, and powerful insights into daily consumption. While many homeowners traditionally rely on utility companies for meter upgrades, today’s technology—and the resources offered by various service providers, including Grus—makes it easier than ever to either handle the installation yourself or hire a professional to ensure everything is set up correctly.
This blog will serve as your all-in-one guide for smart meter installation, from understanding the basics of meter technology to exploring advanced IoT-based energy systems. We will also discuss the pros and cons of self-installation versus professional services, tips for troubleshooting, and how to maximize cost savings once your new meter is up and running.
1. Introduction to Smart Meters
A smart meter is an electronic device that records and transmits your household’s energy consumption data in real time or near real time. While older meters need manual reading and offer limited insight, smart meters provide granular data on how and when you use electricity, gas, or both. This information is typically shared with your energy supplier through secure communication channels (e.g., cellular networks, RF mesh, or power-line communication).
Core Features
- Two-Way Communication: Unlike analog meters, smart meters communicate with utility providers and can receive updates or directives remotely.
- Real-Time Monitoring: Users can view consumption data in hourly or even 15-minute increments.
- Usage Insights: Most smart meters integrate with dashboards or apps, helping you understand which appliances or routines drive up your bills.
Smart meters are a foundational element for advanced home energy management systems. Whether you are planning to add rooftop solar, a battery storage unit, or an electric vehicle (EV) charger, a smart meter can help align all these elements into an efficient, data-driven ecosystem.
2. Why Switch to a Smart Meter?
Many regions around the world are embracing smart meter installation as part of larger initiatives to modernize the grid. However, there are also clear, direct benefits for homeowners:
- Accurate Billing
Traditional meters often rely on estimates or manual readings, which can lead to billing discrepancies. Smart meters eliminate guesswork by providing exact data on consumption. - Energy Efficiency Gains
Access to real-time information makes it easier to spot inefficiencies—like an old fridge that’s spiking nighttime usage, or a heating system running at odd hours. - Cost Savings
With many utility companies offering time-of-use (TOU) rates, you can tailor high-energy tasks (laundry, dishwashing, EV charging) to off-peak periods, reducing monthly expenses. - Reduced Carbon Footprint
By optimizing consumption patterns, smart meters indirectly help reduce overall energy demand, leading to lower greenhouse gas emissions and a more sustainable grid. - Future-Readiness
If you plan to expand into IoT-based energy systems—such as device-level automation, home batteries, or vehicle-to-grid (V2G) setups—a smart meter is your first step toward a fully connected home.
3. DIY vs. Professional Installation
One of the most common questions surrounding smart meter installation is whether to tackle the job yourself or hire a certified professional. Resources like Grus’s solutions page make it more feasible for homeowners to attempt a DIY route. However, professional services remain popular for a host of reasons.
3.1. Pros and Cons of a DIY Approach
Pros
- Cost Savings: Avoid professional labor fees, potentially saving a few hundred dollars.
- Learning Experience: Gain hands-on knowledge about your home’s wiring and electrical infrastructure.
- Flexibility: Schedule and carry out the installation at your own convenience without waiting for a service appointment.
Cons
- Complexity: Electric meter installation involves dealing with live wiring, local regulations, and safety risks.
- Limited Support: If issues arise, you may need to troubleshoot on your own, which can be time-consuming.
- Insurance and Liability: Improper installation can void warranties or insurance coverage if damage occurs.
3.2. Why Hire a Professional?
A professional or utility-appointed technician ensures the job is done safely and up to code. This is crucial because some regions require a licensed electrician for any work involving a home’s main electrical panel. Professionals also have dedicated tools to test voltage levels, validate connectivity, and confirm the meter’s compatibility with existing infrastructure.
3.3. Comparison Table: DIY vs. Professional Services
Below is a quick table summarizing key differences between a self-installed smart meter project and hiring a professional team:
| Factor | DIY Installation | Professional Services |
|---|---|---|
| Cost | Typically lower initial cost (no labor fees) | Higher upfront cost due to labor fees |
| Skill Level | Requires electrical knowledge | Technician or electrician with specialized training |
| Time Commitment | Variable; depends on the homeowner’s skills | Usually faster; 1-2 hours for standard installations |
| Regulatory Hurdles | Must confirm local legality, permits | Handled by the service provider; they know legal requirements |
| Support & Warranty | Minimal, unless covered by manufacturer | Often includes post-installation support and longer warranty coverage |
| Risk Level | Higher (incorrect wiring, safety hazards) | Lower (professionals are trained to avoid and handle risks) |
4. Key Preparations Before Installing
4.1. Understanding Local Regulations
Regulations vary widely by region. Some utilities offer free smart meter installation programs, while others let homeowners purchase approved meters on their own. In certain jurisdictions, altering or replacing an electric meter without professional credentials is prohibited by law.
Tip: Check with your energy provider or local government for guidelines, permit requirements, and recommended device lists.
4.2. Tools and Materials You’ll Need
For those attempting a DIY smart meter installation, gather the following:
- Voltage Tester or Multimeter
- Insulated Screwdrivers and Pliers
- Protective Gloves and Eyewear
- Mounting Hardware (depending on meter type)
- Communication Module (if not integrated within the meter)
- Wireless or Cellular Gateway (for data transmission, if required)
4.3. Safety Precautions
- Turn Off Main Power: Always disconnect power at the circuit breaker or main switch before handling any electrical components.
- Follow Manufacturer Guidelines: Meters from different brands have specific instructions for installation.
- Work in Daylight or Adequate Lighting: Minimizes the chance of accidental wiring mistakes.
- Consider a Buddy System: Having someone nearby is an excellent safety measure in case of emergencies.
5. DIY Smart Meter Installation: Step-by-Step Guide
Disclaimer: The instructions below provide a general overview. Always consult your meter’s official manual and check local codes before proceeding.
- Power Down
- Switch off the main breaker or fuse box to ensure no electricity flows to the meter.
- Remove Old Meter
- Typically involves loosening a locking ring or seal and carefully pulling the meter from its socket.
- Record the final reading of the old meter for billing reconciliation.
- Inspect the Meter Base
- Check for corrosion, loose wires, or damage.
- Use a voltage tester to confirm there is no current.
- Install the Smart Meter
- Align the prongs on the new meter with the socket. Gently push it in until it’s firmly seated.
- Secure it with the locking ring or any required fasteners.
- Connect Communications
- If the meter doesn’t have a built-in transmitter, attach the external module per the manufacturer’s guidelines.
- Ensure the communication gateway (Wi-Fi, cellular, or RF) is set up properly.
- Restore Power
- Flip the main breaker back on. Monitor the smart meter’s display or indicator lights to confirm it’s functioning correctly.
- Run Initial Checks
- Use any provided in-home display or online dashboard to verify real-time consumption data.
- Look for error messages or abnormal readings.
5.1. Installation Flowchart
Below is a Mermaid flowchart illustrating the DIY installation steps in a simplified visual format:
flowchart TB
    A[Turn Off Main Power] --> B[Remove Old Meter]
    B --> C[Inspect Meter Base]
    C --> D[Install New Smart Meter]
    D --> E[Connect Communication Module]
    E --> F[Restore Power]
    F --> G[Run Initial Checks]
Explanation:
- Turn Off Main Power at the breaker for safety.
- Remove Old Meter by releasing locks or seals.
- Inspect Meter Base for any damage before placing the new meter.
- Install New Smart Meter and ensure it’s securely seated.
- Connect Communication Module (if necessary).
- Restore Power and confirm everything is functioning.
- Run Initial Checks using an in-home display or dashboard.
6. Professional Installation: What to Expect
If you choose a professional service, particularly one recommended by your utility or a smart meter solutions provider like Grus, the process often includes:
- Pre-Installation Assessment
- A technician evaluates your home’s electrical system, ensuring compatibility and identifying any required upgrades.
- Scheduled Appointment
- On the day of installation, the technician will shut off power briefly, replace the meter, run initial tests, and ensure connectivity.
- Demonstration
- You’ll receive a basic overview of how to read the meter, monitor your usage, and leverage any associated apps or web portals.
- Post-Installation Support
- Professionals typically offer a support window (e.g., 30-90 days) in which they can answer questions, address errors, and guide you on optimizing your energy consumption.
7. Post-Installation Best Practices
7.1. Reading and Interpreting Your Data
After the meter is activated, you can monitor your usage in various ways:
- In-Home Display (IHD): Shows immediate consumption rates, costs, and trends.
- Online Portal or App: Check daily or weekly usage, set consumption alerts, and compare historical data.
- Automated Alerts: Many systems let you set thresholds for energy use, sending notifications when you approach or exceed them.
Pro Tip: Regularly check your data for anomalies. Unusual spikes might indicate a malfunctioning appliance or faulty wiring.
7.2. How Grus Solutions Supports Homeowners
Grus’s smart meter solutions emphasize seamless integration with IoT-based energy systems:
- Advanced Data Analytics: Identify consumption patterns, forecast usage, and receive actionable recommendations.
- Multi-Protocol Support: Grus supports several communication protocols, ensuring your meter can work with different devices—smart thermostats, battery inverters, or EV chargers—without complicated bridging.
- Scalability: Whether you’re starting small with a single meter or planning to outfit an entire property with advanced sensors, Grus’s modular approach allows you to scale over time.
7.3. Troubleshooting Common Issues
- Connectivity Gaps: Move the wireless gateway closer to the meter, or consult your provider about a signal booster.
- Inaccurate Readings: Ensure your meter is securely seated. Corrosion or loose connections can cause data distortions.
- Power Surges: Install surge protectors on major appliances; consult an electrician if surges persist.
8. Making the Most of Smart Meter Analytics
Your new smart meter isn’t just a fancy digital display; it’s a treasure trove of data that can transform how you manage your home’s energy.
8.1. Integrating IoT-Based Energy Systems
By pairing your smart meter with IoT hubs or voice-controlled devices (e.g., Amazon Alexa, Google Nest), you can:
- Automate Temperature Control: Adjust HVAC settings based on real-time electricity rates.
- Coordinate Appliance Usage: Schedule dishwashers, laundry machines, or EV chargers during off-peak times.
- Monitor Household Zones: Get detailed reports on specific circuits or rooms, detecting potential inefficiencies.
8.2. Tracking Energy Efficiency Over Time
As your usage behavior evolves, you’ll be able to see:
- Seasonal Trends: Compare winter vs. summer consumption.
- Year-over-Year Improvements: Validate the ROI of energy-efficient appliances or insulation upgrades.
- Peak Demand Management: Make targeted changes to reduce usage during the most expensive times of day.
8.3. Potential for Additional Cost Savings
Beyond lowering your monthly bill, advanced analytics can uncover hidden opportunities:
- Demand Response Incentives: Some utilities pay customers to reduce usage during grid stress events.
- Solar Net Metering: If you generate your own power, a smart meter streamlines net metering, ensuring you receive proper credit for surplus energy.
- Community Energy Sharing: Future expansions might include microgrid participation, where neighbors trade excess solar power or collectively store energy.
8.4. Energy Consumption Breakdown Chart
For many households, one of the biggest values of a smart meter is identifying which devices or routines consume the most energy. Below is a sample Mermaid pie chart illustrating a hypothetical monthly electricity usage breakdown in a typical home:
pie title Monthly Electricity Usage Breakdown
    "HVAC" : 35
    "Lighting" : 15
    "Kitchen Appliances" : 20
    "Electronics (TV, Computers)" : 15
    "Laundry (Washer/Dryer)" : 10
    "Miscellaneous" : 5
Interpretation:
- HVAC often dominates household energy use, making it a prime target for energy-saving measures such as smart thermostats.
- Kitchen Appliances and Lighting are also significant, suggesting high-impact opportunities for upgrading to energy-efficient bulbs or modern appliances.
- Electronics usage can vary greatly depending on how many devices you have and how often they’re left on standby.
9. Security and Privacy Considerations
Given that smart meters often transmit data wirelessly, it’s natural to wonder about security and privacy:
- Encrypted Data: Modern smart meters encrypt communication so that unauthorized parties can’t access your personal consumption stats.
- Anonymized Sharing: Data shared with utilities is usually aggregated to protect individual user identities.
- Regulatory Oversight: Many regions have laws and frameworks (e.g., GDPR in Europe, state-level regulations in the U.S.) governing how utility companies store and handle consumption data.
Tip: Always read the privacy policy and terms of service from your meter’s manufacturer and your utility. This ensures you understand how your data is being used and stored.
10. Future of Smart Metering and Home Energy Management
The ongoing evolution of smart meters is tied closely to broader advances in IoT-based energy systems and grid modernization. Looking ahead, expect:
- 5G Integration
Faster, more reliable wireless coverage that can handle higher data loads, enabling real-time adjustments and improved remote diagnostics. - Peer-to-Peer Energy Trading
Blockchain or similar distributed ledger technologies could allow households to buy and sell excess power directly to neighbors, with the smart meter verifying transactions. - Edge Computing
Future meters may incorporate mini-processors that analyze data locally, reducing latency and improving response times. - AI-Driven Automation
As artificial intelligence becomes more sophisticated, predictive algorithms will optimize when you run appliances, charge EVs, or draw from battery reserves—maximizing savings while minimizing environmental impact.
Upgrading to a smart meter represents a significant leap forward in home energy management. Whether you prefer a DIY approach—leveraging your own skills and guides like those offered by Grus Solutions—or lean on the expertise of a professional, the outcome can be transformative. You gain real-time insights, enhanced billing accuracy, and a platform for future integrations like solar arrays or EV chargers.
As you weigh the benefits of self-installation versus professional services, keep in mind the importance of local regulations, thorough safety measures, and post-installation support. Above all, remember that the true value of a smart meter lies not just in the technology, but in how you use the data to make informed, sustainable, and cost-saving decisions.
With the right meter in place and a solid plan for analyzing and acting on your consumption patterns, you’ll be well-positioned to join the ranks of homeowners who’ve turned energy usage into a streamlined, automated, and eco-friendly process.
