Posted on Leave a comment

How to Choose the Best Home Energy Monitor in 2025?

Best Home Energy Monitor in 2025

With rising electricity costs and an increasing focus on energy efficiency, homeowners in 2025 are looking for smarter ways to monitor and optimize power usage. A home energy monitor provides real-time data on electricity consumption, helping users reduce waste, lower bills, and maximize efficiency.

πŸ’‘ But with so many options available, how do you choose the best home energy monitor in 2025?

This guide covers:

βœ… What a home energy monitor does and why it’s essential in 2025
βœ… Key features to look for in a smart energy tracker
βœ… Comparison of top-rated home energy monitors
βœ… How AI and automation improve energy efficiency
βœ… The best home energy monitors for different needs


1. What is a Home Energy Monitor & Why Do You Need One?

A home energy monitor is a smart device that tracks your electricity usage in real-time, allowing homeowners to:
βœ” Identify high-energy-consuming appliances
βœ” Track peak usage hours and reduce costs
βœ” Monitor energy production (solar, battery storage)
βœ” Optimize power distribution for efficiency

1.1 How Does a Home Energy Monitor Work?

Most smart energy monitors use CT (current transformer) clamps or plug-in sensors to measure energy flow through your main electrical panel or individual outlets. These devices transmit data wirelessly to an app or dashboard, providing live insights and historical reports.

graph TD; A["Power Grid"] -->|Electricity Supply| B["Home Main Panel"] B -->|CT Clamps Measure Current| C["Smart Energy Monitor"] C -->|Sends Data via WiFi| D["Mobile App & Dashboard"] D -->|User Analyzes Energy Trends| E["Optimize Power Usage & Reduce Costs"]

πŸ“Œ Key Benefits of Using a Home Energy Monitor:
βœ… Saves money – Reduce your energy bill by up to 30%.
βœ… Enhances efficiency – Identify wasted electricity and optimize device usage.
βœ… Supports sustainability – Track solar power generation and battery storage.

2. Key Features to Look for in a Home Energy Monitor

When choosing a home energy monitor in 2025, consider these essential features:

FeatureWhy It Matters
Real-Time Energy TrackingProvides instant insights on electricity consumption.
AI Energy OptimizationUses machine learning to predict and reduce waste.
Smart Home IntegrationWorks with SmartThings, Alexa, Google Home, Home Assistant.
Solar & Battery MonitoringTracks solar energy production and storage efficiency.
Mobile App & AlertsSends real-time alerts for energy spikes or anomalies.
Easy InstallationUses CT clamps for panel-level monitoring or plug-in sensors for specific devices.

πŸ“Œ Example:
Grus Split-Phase Electric Monitor
βœ” Real-time tracking of 120/240V split-phase home power
βœ” AI-driven efficiency recommendations
βœ” Seamless SmartThings & Alexa integration

3. Best Home Energy Monitors in 2025 – Feature Comparison

With many options available, choosing the best home energy monitor in 2025 depends on your needs, home size, and desired features. Below is a comparison of the top-rated energy monitors based on real-time tracking, AI optimization, smart home integration, and ease of use.

3.1 Feature Comparison of Top Home Energy Monitors

FeatureGrus Split-Phase MonitorBrand X MonitorBrand Y Monitor
Real-Time Energy Trackingβœ… Yesβœ… Yesβœ… Yes
AI Energy Optimizationβœ… Yes❌ Noβœ… Yes
Smart Home Integrationβœ… Alexa, SmartThings⚠️ Limitedβœ… Yes
Solar & Battery Monitoringβœ… Yes❌ No⚠️ Basic
Mobile App & Alertsβœ… Yesβœ… Yesβœ… Yes
Installation TypeCT Clamps (Main Panel)Plug-in SensorsCT Clamps (Main Panel)
Best ForWhole-home monitoringAppliance trackingWhole-home monitoring

πŸ“Œ Key Takeaways:

  • Best for Whole-Home Monitoring: Grus Split-Phase Monitor
  • Best for Appliance-Level Tracking: Brand X Monitor
  • Best for AI-Powered Energy Efficiency: Grus & Brand Y Monitors

4. Who Should Use a Home Energy Monitor?

4.1 Homeowners – Maximize Savings & Optimize Energy Usage

βœ” Whole-home monitoring helps cut unnecessary energy waste.
βœ” Identify peak usage periods and adjust habits to lower bills.
βœ” Great for solar and battery users who want to track power efficiency.

4.2 Renters – Monitor Specific Devices to Reduce Costs

βœ” Use smart plugs or portable monitors to track appliance usage.
βœ” Prevent phantom energy drain from standby electronics.
βœ” Gain energy insights without modifying the home’s electrical panel.

4.3 Smart Home Enthusiasts – Automate Energy Efficiency

βœ” Integrate with SmartThings, Alexa, and Google Home for automation.
βœ” Set triggers for turning off appliances when not in use.
βœ” Monitor EV charging, HVAC efficiency, and high-power devices.

5. AI-Powered Energy Monitoring – Is It Worth It?

The latest home energy monitors in 2025 come with AI-powered insights, allowing for:
πŸ”Ή Predictive analytics – Forecasting energy use based on past trends.
πŸ”Ή Smart automation – Adjusting thermostat and lighting schedules.
πŸ”Ή Anomaly detection – Alerting users about unusual power consumption.

graph TD; A["AI-Powered Home Energy Monitor"] -->|Tracks Real-Time Usage| B["Analyzes Consumption Patterns"] B -->|Predicts Future Energy Needs| C["Optimizes Smart Home Devices"] C -->|Reduces Energy Waste| D["Lowers Electricity Bills"]

πŸ“Œ Example Use Case:

  • AI detects that your HVAC system is running inefficiently due to a clogged filter.
  • The system notifies you via the app, suggesting a maintenance check.
  • Energy savings: Up to 15% on heating and cooling costs.

6. Choosing the Right Home Energy Monitor for Your Needs

By now, you understand the benefits and key features of home energy monitors. But which one is best for you?

6.1 Key Considerations for Choosing a Home Energy Monitor

ConsiderationBest Choice
Do you need whole-home monitoring?Yes β†’ Grus Split-Phase Monitor
Do you need to track specific appliances?Yes β†’ Plug-in smart monitors
Do you have solar panels or battery storage?Yes β†’ Monitor with solar tracking capabilities
Do you want AI-powered recommendations?Yes β†’ AI-based energy monitors
Do you need smart home integration?Yes β†’ Look for Alexa, SmartThings, or Google Home support

πŸ“Œ Best Choice for Most Homeowners: Grus Split-Phase Electric Monitor
βœ” Real-time whole-home energy tracking
βœ” AI-powered energy efficiency insights
βœ” Seamless SmartThings & Alexa integration

7. How to Install a Home Energy Monitor

Installing a home energy monitor depends on whether you are using a whole-home monitor or plug-in smart monitor.

7.1 Installing a Whole-Home Smart Energy Monitor

πŸ“Œ Installation Steps for Grus Split-Phase Monitor:
1️⃣ Turn off power at the main breaker panel.
2️⃣ Attach CT clamps around the main power lines (L1 & L2) in the panel.
3️⃣ Connect the monitor to WiFi and configure the mobile app.
4️⃣ Start monitoring real-time energy consumption!

graph TD; A["Turn Off Main Breaker"] --> B["Install CT Clamps on L1 & L2"] B --> C["Connect to Smart Energy Monitor"] C --> D["Sync with Mobile App & WiFi"] D --> E["Start Monitoring & Optimize Energy Usage"]

7.2 Installing a Plug-Level Energy Monitor

1️⃣ Plug the smart energy monitor into an outlet.
2️⃣ Connect the appliance you want to monitor.
3️⃣ Use the app to track real-time and historical energy consumption.
4️⃣ Set automation rules to optimize energy usage.

πŸ“Œ Best for: Renters or homeowners who want to track specific appliances instead of the entire home.

8. How to Integrate Smart Energy Monitoring into Your Daily Routine

A home energy monitor is most effective when it’s part of a smart energy-saving strategy.

βœ… Automate High-Energy Devices

  • Set EV chargers, dishwashers, and washing machines to run during off-peak hours.

βœ… Optimize Smart Thermostats

  • Adjust heating & cooling settings based on real-time energy tracking.

βœ… Get Instant Alerts on High Energy Usage

  • Set notifications for unexpected power surges or energy spikes.

βœ… Track Solar Production & Battery Storage

  • Ensure optimal energy balance between solar, battery, and grid usage.

Key Takeaways:

βœ” Home energy monitors reduce waste and cut electricity bills.
βœ” Choose a monitor based on whole-home vs. appliance tracking needs.
βœ” AI-powered insights help automate energy savings.
βœ” Smart home integration ensures efficient energy use.
βœ” Grus Smart Energy Monitor is a top choice for homeowners looking to optimize electricity usage.

πŸš€ Take control of your electricity bill today!
πŸ‘‰ Get the Grus Smart Energy Monitor Now!

Posted on Leave a comment

How to Reduce Your Electricity Bill with Smart Energy Monitors?

Reduce Your Electricity Bill

Electricity bills are a significant household expense, and many homeowners wonder how to reduce their energy costs effectively. The challenge is that most people don’t know where their energy is goingβ€”which appliances are consuming the most power, when peak usage occurs, or how much energy is wasted.

πŸ’‘ This is where smart energy monitors come in.

By providing real-time data on your electricity usage, these devices empower you to optimize energy consumption, reduce waste, and cut costs. In this guide, we’ll explore:

βœ… How smart energy monitors work
βœ… The different types of smart energy monitors
βœ… How to use data to optimize energy usage
βœ… How much you can save by using one
βœ… Best smart energy monitors for homes


1. What Is a Smart Energy Monitor?

1.1 Understanding Smart Energy Monitors

A smart energy monitor is a device that tracks your real-time electricity usage, giving you detailed insights into your home’s energy consumption.

1.2 Key Features of Smart Energy Monitors

βœ” Real-time energy tracking – See live data on power consumption.
βœ” Breakdown of appliance usage – Identify which devices use the most electricity.
βœ” Historical energy reports – Analyze usage trends over time.
βœ” Integration with smart home systems – Connect to Alexa, Google Home, SmartThings.
βœ” Energy-saving recommendations – AI-driven insights to help reduce costs.

2. Types of Smart Energy Monitors

2.1 Whole-Home Smart Energy Monitors

πŸ”Ή Installed on your electrical panel, monitoring entire home energy usage.
πŸ”Ή Uses CT (current transformer) clamps to measure energy flow.
πŸ”Ή Best for: Homeowners who want complete energy visibility.

Example:
πŸ“Œ Grus Split-Phase Electric Monitor
βœ” Tracks 120V/240V split-phase power in most American homes.
βœ” Provides real-time energy insights and AI-driven recommendations.

2.2 Plug-Level Smart Energy Monitors

πŸ”Ή Plug into individual appliances to measure their energy consumption.
πŸ”Ή Help track high-energy devices like refrigerators, space heaters, and gaming PCs.
πŸ”Ή Best for: Renters or homeowners who want specific device tracking.

2.3 Utility Smart Meters

πŸ”Ή Provided by electricity providers, offering monthly or hourly usage reports.
πŸ”Ή Best for: Homeowners who don’t want additional hardware.

3. How Smart Energy Monitors Help Reduce Your Electricity Bill

3.1 Identifying Energy Hogs

πŸ”Ή Did you know? Your HVAC system, water heater, and refrigerator are likely your top energy consumers.
πŸ”Ή A smart monitor pinpoints inefficient appliances, so you know what to adjust.

graph TD; A["Total Energy Usage"] -->|40%| B["HVAC System"] A -->|15%| C["Water Heater"] A -->|10%| D["Refrigerator"] A -->|5%| E["Lighting"] A -->|30%| F["Other Appliances"]

πŸ”Ή Solution:
βœ” Upgrade to ENERGY STAR appliances.
βœ” Use smart thermostats to reduce HVAC energy waste.
βœ” Set your water heater to 120Β°F (49Β°C) for better efficiency.

4. How to Use Smart Energy Monitor Data to Optimize Usage

Once you have installed a smart energy monitor, the real power lies in how you use the data. By analyzing real-time and historical energy consumption, you can identify patterns and take action to reduce unnecessary energy waste.

4.1 Tracking Peak Usage Times

πŸ”Ή Many utilities charge more during peak hours (e.g., 4 PM – 9 PM).
πŸ”Ή A smart monitor helps you shift usage to off-peak hours and lower your bill.

Example: πŸ“Œ You notice that your dishwasher runs at 7 PM every night, a peak rate time.
βœ… Solution: Set the dishwasher to run after 10 PM using a smart timer or automation.

Peak vs. Off-Peak Electricity Usage:

xychart-beta title "Electricity Cost Throughout the Day" x-axis "Time of Day" ["Midnight", "6 AM", "Noon", "4 PM", "8 PM", "10 PM"] y-axis "Electricity Cost (cents/kWh)" line "Electricity Cost" [8, 12, 15, 20, 18, 10]

πŸ”Ή Actionable Tip: Run major appliances (washing machine, dishwasher, EV charger) during off-peak hours to maximize savings.

4.2 Reducing Vampire Loads (Phantom Energy Usage)

Even when turned off, many appliances still consume electricityβ€”this is called phantom energy or vampire load.

πŸ”Ή Common culprits: TVs, gaming consoles, microwaves, and chargers.
πŸ”Ή Smart energy monitors reveal hidden energy drains so you can eliminate waste.

Example:
πŸ“Œ Your TV and gaming console consume 30W when idle.
βœ… Solution: Use smart power strips or schedule them to turn off completely when not in use.

DeviceStandby Power Usage (W)Annual Cost () (Assuming 0.15/kWh)
Game Console30W$40
Microwave10W$14
TV15W$20
Laptop Charger5W$7

πŸ”Ή Actionable Tip: Use smart plugs or timers to automatically cut power to devices when not in use.

4.3 Optimizing HVAC and Heating Systems

πŸ”Ή Heating and cooling account for up to 50% of household energy use!
πŸ”Ή A smart energy monitor can show you when your HVAC is running inefficiently.

Example:
πŸ“Œ Your heater turns on frequently at night, even when you’re asleep.
βœ… Solution: Lower your thermostat by 5-7Β°F (3-4Β°C) at night to save up to 10% on heating costs.

Smart Thermostat Efficiency Settings:

pie title "Smart Thermostat Savings Distribution" "Nighttime Setback (Lower Heating)" : 40 "Daytime Adjustment" : 30 "HVAC Automation" : 30

πŸ”Ή Actionable Tip: Use smart thermostats like EcoNet-TU to automate heating and cooling for maximum efficiency.

5. How Much Can You Save with a Smart Energy Monitor?

5.1 Estimated Annual Savings

Energy Reduction StrategyPotential Savings
Using energy-efficient appliances10-20%
Running appliances during off-peak hours5-15%
Eliminating vampire loads5-10%
Optimizing HVAC with a smart thermostat10-30%

πŸ“Œ Total Potential Savings: Up to 30-50% on your electricity bill!

5.2 Real-Life Case Study: A Smart Energy Monitoring Success Story

🏑 Homeowner Profile:

  • Location: California
  • Pre-Smart Monitor Bill: $200/month
  • After Using a Smart Monitor: $140/month
  • Annual Savings: $720 per year!

What Changed?
βœ… Shifted appliance usage to off-peak hours
βœ… Identified and eliminated phantom energy waste
βœ… Adjusted HVAC settings for optimal efficiency

6. How to Choose the Right Smart Energy Monitor for Your Home

Now that you understand how smart energy monitors help reduce electricity bills, it’s time to choose the best one for your needs.

6.1 Key Factors to Consider

βœ… Whole-Home vs. Plug-Level Monitoring

  • Whole-home monitors track overall energy usage.
  • Plug-level monitors track specific devices.

βœ… Compatibility with Home Electrical System

  • Most U.S. homes use split-phase (120/240V).
  • Larger buildings use three-phase (208V/480V).

βœ… Real-Time Monitoring & Data Insights

  • Live energy tracking & historical reports.
  • AI-driven energy-saving recommendations.

βœ… Smart Home Integration

  • Works with Alexa, Google Home, SmartThings, Home Assistant.

βœ… Ease of Installation

  • CT clamp-based monitors (easy installation in main panel).
  • Smart plug-based devices (for individual appliances).

6.2 Comparison of Best Smart Energy Monitors

FeatureGrus Split-Phase Electric MonitorOther Brands
Whole-home monitoringβœ… Yesβœ… Yes
Plug-level monitoringβœ… Yes (with smart plugs)⚠️ Limited
AI energy analysisβœ… Yes⚠️ Some models
Smart home integrationβœ… Yes (SmartThings, Alexa)⚠️ Varies
Works with solar & batteryβœ… Yes⚠️ Limited
Easy installationβœ… Yes (CT clamp-based)⚠️ Moderate

πŸ”Ή Best for: Homeowners who want complete energy visibility and cost savings.

7. How to Integrate a Smart Energy Monitor into Your Home

7.1 Step-by-Step Installation Guide

πŸ“Œ For Whole-Home Energy Monitors (like Grus Split-Phase Electric Monitor):
1️⃣ Turn off power at the main panel.
2️⃣ Attach CT clamps around L1 & L2 wires in your electrical panel.
3️⃣ Connect monitor to WiFi & configure app settings.
4️⃣ Start tracking real-time energy usage!

πŸ“Œ For Plug-Level Energy Monitors:
1️⃣ Plug the device into an outlet.
2️⃣ Connect your appliance to the smart plug.
3️⃣ Set schedules and monitor usage through the app.

7.2 How to Automate Energy Efficiency with Smart Home Integration

graph TD; A["Smart Energy Monitor"] -->|Tracks Real-Time Usage| B["Energy Dashboard"] B -->|Detects Energy Waste| C["AI Optimization Suggestions"] C -->|Triggers Automation| D["Smart Home Devices"] D -->|Reduces Energy Consumption| E["Lower Electricity Bills"]

βœ… Example Automations:

β€’ Automatically turn off high-energy devices when not in use.

β€’ Schedule appliances to run during off-peak hours.

β€’ Adjust smart thermostat settings based on energy usage.


Best Smart Energy Monitor for Maximum Savings

πŸš€ Looking for a complete home energy monitoring solution?

βœ” Real-time tracking of 120/240V home energy use

βœ” AI-powered energy-saving recommendations

βœ” Seamless integration with SmartThings & Alexa

πŸ‘‰ Get the Grus Smart Energy Monitor Today!

Key Takeaways:

βœ… Smart energy monitors help track real-time power consumption.

βœ… Identifying energy-hogging appliances can lead to 30-50% savings.

βœ… Whole-home & plug-level monitoring offers complete visibility.

βœ… Integration with smart home automation further optimizes energy efficiency.

Posted on Leave a comment

California Climate Credits Provide Residents with $137 Utility Bill Refund via Cap-and-Trade Program

California Climate Credits Refund

In a significant move reflecting the state’s continued commitment to environmental sustainability and energy conservation, California residents will soon see substantial savings on their utility bills. In April 2025, millions of households across the state will receive an average refund of $137, directly credited to their utility bills as part of the ongoing California Climate Credits initiative.

image 2 -

The California Climate Credits, a key component of California’s ambitious Cap-and-Trade Program, aim to reward households and businesses that contribute to statewide greenhouse gas emission reductions. Established by the California Air Resources Board (CARB), the Cap-and-Trade Program sets strict limits on carbon emissions and allows companies to trade emission permits, incentivizing cleaner operations and significant reductions in overall carbon footprints.

Since its inception in 2014, the program has redistributed billions of dollars back to residents through Utility Bill Refunds, helping to offset the financial burden of transitioning toward more sustainable and energy-efficient practices. As of 2025, the state has issued approximately $10.9 billion in climate credits, significantly easing household energy costs.

Refund amounts vary according to the type of utility service and specific providers. Customers of major utility providers such as Pacific Gas and Electric Company (PG&E), San Diego Gas & Electric (SDG&E), Southern California Gas Company (SoCalGas), and Southwest Gas can expect credits ranging from $35 to as much as $259. Most households receiving electricity services can anticipate refunds between $56 and $81, while gas service customers will receive between $54 and $87. Households subscribing to both gas and electricity services will enjoy combined credits, further enhancing the program’s financial relief.

For instance, residents using electricity supplied by Southern California Edison (SCE) will specifically receive a refund of approximately $56, directly applied to their April utility bills. Such refunds highlight how the California Climate Action initiative has tangibly supported residents through financial benefits linked directly to environmental conservation efforts.

Funding for these utility bill credits is directly derived from the proceeds generated by auctioning carbon emission permits within the Cap-and-Trade Program. By redistributing these funds, California not only ensures households benefit financially but also reinforces the importance of energy conservation and sustainable practices among residents. Governor Gavin Newsom’s administration has strongly emphasized that these credits serve a dual purpose: providing immediate economic relief while encouraging continued investment in sustainability initiatives.

Since the launch of the Cap-and-Trade Program, California has allocated approximately $28 billion toward climate-friendly investments. These funds have financed more than 500,000 local projects, including affordable housing near major employment hubs, the nation’s pioneering high-speed rail network, and widespread adoption of zero-emission vehicles and infrastructure across underserved communities. Consequently, these initiatives have collectively supported job creation, reduced air pollution significantly, and enhanced overall quality of life.

On average, individual California households have cumulatively received over $1,120 in climate credits since the program startedβ€”a powerful incentive motivating continued personal and community engagement in California’s climate action goals. The consistent financial relief provided by these credits plays an essential role in assisting families in managing their household budgets amid rising living costs.

The forthcoming $2.4 billion round of credits earmarked for April 2025 is part of California’s broader strategy to accelerate energy conservation efforts and meet ambitious climate targets. This allocation includes approximately $1.4 billion for electricity consumers and $1 billion specifically directed toward gas service users. Additionally, $122 million has been dedicated exclusively to small businesses, recognizing the vital role of smaller enterprises in driving economic sustainability and innovation.

By clearly linking financial incentives to reduced carbon emissions and energy conservation, the state government aims to foster long-term behavioral change among residents and businesses alike. This strategic alignment ensures sustained momentum toward achieving California’s climate goals, including significantly lowering statewide emissions and becoming a national leader in renewable energy deployment.

Governor Newsom highlighted that these California Climate Credits not only symbolize a successful integration of environmental policy and economic stimulus but also underscore the proactive approach California continues to adopt in addressing climate challenges. Residents receiving these refunds can reinvest the savings into other areas of their household budgets, stimulating local economies and reinforcing community resilience.

Overall, the continued success and popularity of California Climate Credits affirm public support for robust, well-funded climate policies. Looking ahead, California’s Cap-and-Trade Program and its associated Utility Bill Refunds will remain crucial tools in driving forward the state’s ambitious environmental goals, shaping California as a pioneering example of comprehensive, effective climate action.

As residents anticipate their April refunds, the practical benefits of California’s environmental policies become ever clearer. Each credit not only symbolizes financial relief but also stands as tangible proof of the positive outcomes achievable through focused environmental governance and dedicated public participation in energy conservation.

Posted on Leave a comment

Empowering a Smart Energy Lifestyle: Home Electricity Monitoring & Cost Savings with the Split-phase Electric Monitor

Smart Energy Lifestyle

In recent years, more and more households have shown interest in the concept of β€œsmart energy.” You may have come across various brands promoting their own β€œhome electricity monitoring” or β€œintelligent distribution” devices, or noticed the growing online buzz around β€œenergy savings” and β€œgreen homes.” In reality, transforming your home energy management into a smart system not only helps you better control energy consumption, but also delivers a safer and more cost-effective experience.

Below, we’ll explore why home electricity monitoring is your first step toward a β€œsmart energy lifestyle.” We’ll also spotlight the Split-phase Electric Monitor, a product that keeps you fully informed of your home’s electrical circuits and lets you embark on a journey of convenience, safety, and savings.


1. Why Do You Need β€œSmart Energy” Monitoring?

image 3 -

1.1 Understand Your Household Electricity Usage

Imagine this scenario: when you’re away from home, which devices are still consuming electricity? Air conditioners, refrigerators, laptops left plugged in… Without proper monitoring tools, it’s challenging to know exactly where each unit of electricity goes.

  • Real-Time Usage Monitoring: High-precision sensors and AI algorithms convert your home’s electricity data into clear, visual insights.
  • Usage Trend Analysis: Identify energy peaks and valleys throughout the day or week, so you can spot potential areas to save.

1.2 Prevent Potential Electrical Risks

Electricity safety is critical, especially in older homes or during periods of high demand.

  • Fault Alerts: The monitoring system quickly detects abnormal power usageβ€”such as sharp voltage fluctuations or short-circuit risksβ€”and sends you warnings so you can address problems right away.
  • Remote Control: If you have smart switches installed, you can switch power on or off remotely, helping prevent accidents like electrical fires.

1.3 Precision Energy Savings for a Sustainable Lifestyle

Smart energy goes beyond simply cutting costsβ€”it also reflects your commitment to a green lifestyle.

  • Accurate Billing: Track electricity use for each circuit or appliance to optimize the way you use high-consuming devices.
  • Lower Carbon Footprint: By fine-tuning your energy use, you reduce wasteful consumption and help protect the environment.

2. Split-phase Electric Monitor: Your All-in-One Smart Electricity β€œButler”

image 5 -

There are plenty of devices on the market claiming to offer complete home electricity monitoring. After evaluating various solutions, we recommend checking out the Split-phase Electric Monitor. Here’s why:

  1. Easy Installation
    No complicated wiring or major reconstruction required. Simply install it in your home’s main electrical panel to monitor your overall electrical load without hassle.
  2. Real-Time, Accurate Monitoring
    Equipped with high-precision sensors and advanced algorithms, the Split-phase Electric Monitor measures individual circuit currents, voltages, and power usage with pinpoint accuracyβ€”helping you see exactly where your energy goes.
  3. Smart Alerts & Remote Management
    Paired with a dedicated app or online platform, you’ll receive immediate alerts when anything unusual (like an overload risk) is detected. You can even remotely switch certain devices on or off right from your phone.
  4. Expandable AI Features
    Over time, your device collects more and more data. Its AI capabilities can analyze trends to suggest better ways to save. It might tell you the best time of day to run your air conditioner or point out which devices are wasting power in standby mode.
  5. Data Visualization & Sharing
    Intuitive graphs let you quickly grasp your daily, weekly, and monthly usage trends. Export reports to share with family or an expert for deeper analysis.

3. How to Get Started with a Smart Energy Lifestyle

  1. Assess Your Home’s Electrical Needs
    • Take a look at your electrical panel, circuits, and total power usage. Determine if the Split-phase Electric Monitor suits your setup.
    • If you’re not sure, consult a professional electrician or installation service.
  2. Purchase and Install the Monitor
    • Visit the Split-phase Electric Monitor official page to learn more about specifications, watch installation videos, and access technical support.
    • Safely install it following the manual or with professional help.
  3. Download the Companion App & Connect to the Network
    • Sign up for an account and link it to your monitor for seamless data collection and system initialization.
    • Set up alert thresholds for things like excessive current or unusual power surges.
  4. Review Usage Trends & Optimize
    • Check your home’s real-time electricity data to identify major energy consumers.Adjust usage schedules for energy-intensive devices like washing machines or water heaters to minimize costs and maximize efficiency.

image 6 -

4. Keep Tabs on Your Larger Smart Home Ecosystem

After you’ve experienced the convenience of smart home electricity management, you may want to expand to other connected home solutions such as:

  • Smart Lighting Systems: Use sensors and remote controls to match brightness with specific scenarios.
  • Smart Security Devices: Equip door/window sensors, smoke detectors, or motion sensors for enhanced home safety.
  • Smart Environment Monitoring: Combine temperature, humidity, and air quality sensors with HVAC for an always-comfortable indoor climate.

When combined with the Split-phase Electric Monitor or other electricity management devices, these systems can create a complete, integrated smart home. Your home becomes more than just a living spaceβ€”it evolves into a hub of innovation that cares for you and the planet.


5. Act Now: Experience a Whole New Level of Energy Savings!

If you’re ready to embrace the world of smart energy, the Split-phase Electric Monitor is a must-have. Its straightforward installation, real-time accuracy, predictive alerts, and AI features ensure a comprehensive upgrade to your home’s energy management.

Call to Action

  • Click the link below to explore more product details and how to order.
  • Take control of your energy use and join the smart, safe, and cost-effective future of home electricity!

Discover & Purchase the Split-phase Electric Monitor


Final Thoughts

You’ve probably seen a lot of buzz about β€œsmart energy,” but turning those concepts into reality means combining the right technology with your specific needs. Choosing a dependable electricity monitoring device like the Split-phase Electric Monitor gives you the crucial data needed to optimize your home’s energy usage. Get started now and enjoy a household that’s both more efficient and more secureβ€”while doing your part for the environment.

Posted on Leave a comment

5 Key Factors When Selecting a Smart Thermostat for Baseboard Heaters

Smart Thermostat for Baseboard Heaters

When it comes to home heating systems, baseboard heaters are a popular choice for many homeowners looking for quiet operation, space efficiency, and targeted heating in individual rooms. However, if you’re still controlling your baseboard heaters with traditional, manually operated thermostats, you may be missing out on significant energy savings and convenience. Upgrading to a Smart Thermostat for Baseboard Heaters can be a game-changer, especially for those seeking improved comfort, better energy management, and remote control capabilities.

But how do you choose from the growing list of smart thermostats on the market? And what specific features should you look for to ensure they’re compatible with electric baseboard heaters? In this blog post, we’ll dive into the top five factors you should consider before investing in a new smart thermostat for your home. By keeping these points in mind, you’ll be able to make a well-informed choice that not only fits your budget but also maximizes comfort and long-term energy savings.


1. Compatibility with Baseboard Heaters

Understanding Electric Baseboard Heaters

Electric baseboard heaters typically operate on a high-voltage system (often 120V or 240V), which is quite different from the 24V low-voltage wiring found in many forced-air furnaces or boiler systems. Because of this voltage difference, not all β€œsmart” thermostats are immediately suitable for baseboard heaters. Some popular brands of smart thermostatsβ€”commonly designed for low-voltage HVAC systemsβ€”won’t work directly with high-voltage lines.

High-Voltage vs. Low-Voltage Thermostats

  • High-voltage thermostats (Line-voltage)
    These thermostats are built to handle the 120V or 240V electric current used by baseboard heaters. If you have line-voltage electric baseboard systems, you’ll need a Smart Thermostat for Baseboard Heaters that specifically supports high-voltage wiring.
  • Low-voltage thermostats (24V)
    Most mainstream smart thermostats, such as those designed for central HVAC, are low-voltage (24V) devices. If your home uses a standard forced-air system or a heat pump, these work well. However, they are generally not plug-and-play compatible with line-voltage systems without specialized relays or adapters.

Checking Thermostat Specifications

Before purchasing any thermostat, carefully check its technical specifications:

  1. Voltage Rating: Confirm it supports 120V or 240V, depending on your system.
  2. Current (Amps) Capacity: Ensure it can handle the amperage your baseboard heater requires.
  3. Wiring Requirements: Some smart thermostats need a neutral wire, a common wire (C-wire), or specific wiring configurations. Verify that your electrical wiring is compatible.

A high-voltage smart thermostat designed for baseboard heaters will typically advertise that feature front and center because it’s a must-have. Make sure you don’t skip this step; choosing an incompatible thermostat can lead to malfunctions, potential damage, or even safety hazards.

2. Connectivity & Control Options

Wi-Fi and App Integration

One of the major selling points of a Smart Thermostat for Baseboard Heaters is the ability to control your home’s temperature remotely. By choosing a thermostat with built-in Wi-Fi, you’ll gain access to a companion mobile application (iOS, Android, or both), where you can:

  • Monitor and adjust your home’s temperature from any location.
  • Receive energy consumption reports or real-time notifications.
  • Set up custom schedules even when you’re away.

This level of connectivity is especially helpful for second homes, vacation properties, or busy professionals who may forget to adjust the thermostat before heading out for the day. With remote access, you can ensure your house is warm and welcoming when you arrive while not wasting energy heating it when you’re away.

Voice Assistant Compatibility

Voice assistant integration is another perk. Thermostats that work with Amazon Alexa, Google Assistant, or Apple HomeKit can be controlled hands-free. If you already have a smart home ecosystem with smart speakers or displays, integrating a voice-activated thermostat can be incredibly convenient:

  • Ask Alexa or Google to increase the temperature by a few degrees.
  • Automate multiple devices: for example, instruct your smart home to turn down the heat and switch off the lights when you say, β€œGood night.”

Voice control is both a convenience and an accessibility feature. For people with mobility challenges, being able to change the temperature without physically accessing the thermostat is a significant advantage.

Security and Privacy

Because your thermostat will be connected to your home Wi-Fi network, be mindful of security and privacy features. Look for thermostats that offer:

  • Encrypted connections (e.g., WPA2/WPA3 Wi-Fi security).
  • Two-factor authentication for your user account.
  • Regular firmware updates to patch potential vulnerabilities.

Ensuring the thermostat’s software is consistently updated helps protect your data and keeps your smart home ecosystem secure.

3. Energy Efficiency & Cost Savings

Built-In Energy Monitoring

A prime benefit of upgrading to a Smart Thermostat for Baseboard Heaters is optimizing your energy usage. Many smart thermostats provide detailed reports on how much energy is consumed daily, weekly, or monthly. By monitoring these usage trends, you can identify patternsβ€”like peak heating times or wastage when rooms are unoccupied.

Advanced Features to Reduce Energy Bills

  • Adaptive Learning
    Some high-end thermostats use machine learning algorithms to learn your schedule and habits. They automatically adjust heating to maintain comfort levels more efficiently. Over time, they refine these patterns and can reduce energy usage considerably.
  • Eco Modes and Geofencing
    Many smart thermostats have an β€œEco Mode” or an β€œAway Mode” that conserves energy when the system senses no one is home. Geofencing uses your phone’s GPS to detect when you leave a certain radius, triggering the system to lower heat, then turning it back up as you approach home.
  • Optimal Start/Stop
    This feature ensures your home reaches a comfortable temperature by a predetermined time. Instead of running the heater at full blast right before you wake up, the system calculates the most efficient way to achieve your target temperature, starting just early enough but no earlier than necessary.

By taking advantage of these advanced capabilities, homeowners typically see a drop in heating costs. Although the initial investment in a smart thermostat may be higher than a simple manual or programmable model, the long-term savings often justify the expense.

4. Programmability & Smart Features

Creating Custom Schedules

Even the simplest programmable thermostats allow you to set distinct temperature schedules for weekdays and weekends. With a Smart Thermostat for Baseboard Heaters, you can often dive deeper:

  • Hourly adjustments: Different temperature settings for morning, midday, evening, and night.
  • Vacation holds: Override normal schedules when you’re out of town.
  • Room-by-room control (if you have multiple thermostats or zoned heating).

Having these granular controls means you can keep living spaces cozy when they’re in use, and let unoccupied areas remain cooler, leading to efficiency gains.

Integration with Other Smart Devices

If you’re already invested in a smart home setupβ€”such as smart lights, security cameras, or door sensorsβ€”your thermostat can often integrate seamlessly. This can allow for advanced home automation scenarios:

  • Smart Scenes: Automate temperature adjustments when lights turn off, or when your smart lock detects that you’ve left the house.
  • Triggered Events: For instance, if a window or door is left open for more than five minutes, your thermostat can be set to automatically shut off or reduce heat to prevent energy waste.

This broader ecosystem connectivity can be a significant selling point, especially for tech-savvy homeowners looking to create a cohesive smart home environment.

Learning Algorithms and AI

Some smart thermostats incorporate AI-driven features to learn your comfort preferences and daily routines. Over time, these thermostats can automatically create the perfect schedule without requiring much manual input. They’ll factor in details such as:

  • Time of day
  • Seasonal changes
  • Occupancy patterns

These sophisticated algorithms can further optimize your heating system, ensuring you only use energy whenβ€”and whereβ€”it’s needed.

5. Installation & User-Friendliness

DIY vs. Professional Installation

When dealing with line-voltage electric systems, safety is paramount. While some brands offer user-friendly installation kits and detailed instructions, others may recommend or even require professional installation. Before deciding, consider:

  • Electrical Know-How: Are you comfortable working with high-voltage wiring? If not, hiring a qualified electrician is the safest option.
  • Local Building Codes: Some municipalities require a licensed professional to handle electrical work.
  • Warranty Requirements: Certain manufacturers only honor product warranties if the thermostat is installed by a certified technician.

Intuitive User Interface

Once it’s installed, you’ll want a user-friendly thermostat interface. Look for models with a clear, backlit display, easy-to-navigate menus, and well-labeled buttons or touchscreen controls. If you have multiple people in the household, ensure that everyoneβ€”tech-savvy or notβ€”feels comfortable using it.

App Design & Ease of Use

Since most smart thermostats rely heavily on a companion smartphone app, a poorly designed app can undermine the entire experience. Before purchasing, read user reviews or watch demo videos to see:

  • Setup Process: How straightforward is it to pair the thermostat with your Wi-Fi network?
  • Menu Layout: Is the app logically organized with clear scheduling and control features?
  • Reliability: Does it frequently lose connection or crash, according to user reports?

Selecting a thermostat backed by a consistently updated app can make all the difference between a seamless, pleasant experience and endless frustration.


Additional Considerations

Aesthetics and Design

While functionality should always take precedence, aesthetics can also matter. Some thermostats boast a sleek, modern design that blends well with contemporary home decor. If you plan on installing multiple smart thermostats throughout your home, a visually appealing device can complement your interior design rather than clash with it.

Brand Reputation and Customer Support

Investing in a well-reviewed brand with reliable customer support can save you a lot of headaches down the line. High-voltage smart thermostats are a niche product, so you want to ensure the company stands behind its product. Look for:

  • Warranty Length: A longer warranty often indicates a company’s confidence in its product.
  • Customer Service Channels: Is there a hotline, email, live chat, or community forum for troubleshooting?
  • User Reviews and Testimonials: Hearing from other customers with baseboard heaters can shed light on real-world performance and issues.

Budget and Long-Term Savings

Smart thermostats specifically designed for high-voltage baseboard heaters can be more expensive upfront compared to basic manual options. However, they also offer greater potential for energy savings. If your heating costs are significant, investing in a high-quality smart thermostat can pay off by reducing your monthly electricity bill. Additionally, certain utility companies and government agencies provide rebates or incentives for installing energy-efficient devicesβ€”check for any applicable programs in your region.


FAQs

1. Do Smart Thermostats for Baseboard Heaters Really Save Money?

Yes, installing a Smart Thermostat for Baseboard Heaters can lead to notable energy savings. By offering precise temperature control, scheduling, and remote adjustments, smart thermostats reduce unnecessary heating when you’re asleep, out of the house, or occupying only certain rooms. Features like eco modes, geofencing, and adaptive learning optimize these savings even more.

2. Can I Install a Smart Thermostat Myself?

It depends on your electrical knowledge and comfort level with high-voltage wiring. Some thermostats are marketed as DIY-friendly and include comprehensive instructions. However, many homeowners opt for professional installation for safety and compliance with local electrical codes. If you’re unsure, consult a licensed electricianβ€”particularly if you’re dealing with 240V wiring.

3. Are There Specific Brands Known for High-Voltage Smart Thermostats?

While many well-known thermostat brands (like Nest or Ecobee) primarily cater to low-voltage systems, there are brandsβ€”Mysa, Stelpro, Sinope, and othersβ€”that specialize in or offer lines specifically for electric baseboard heaters. When in doubt, always check the product description to confirm it supports line-voltage systems.

4. How Do I Know If My Baseboard Heater Requires 120V or 240V?

In most cases, baseboard heaters are 240V, but it’s not a universal rule. Check the heater’s data plate, your circuit breaker label, or the original installation manuals. An electrician can also measure voltage during an inspection to confirm the specifics.

5. Can I Control Multiple Baseboard Heaters with One Smart Thermostat?

In some setups, a single high-voltage thermostat can control multiple baseboard heaters in the same room or zone, provided the total amperage stays within the thermostat’s rated limit. If you want to control each heater individuallyβ€”or have zoned heating in different roomsβ€”you’ll likely need multiple thermostats, one for each zone or circuit.


Conclusion

Selecting a Smart Thermostat for Baseboard Heaters involves more than simply picking a popular brand. The high-voltage nature of baseboard systems means that compatibility is paramount, and not every β€œsmart” device will fit the bill. Beyond that, look for thermostats offering robust connectivity (Wi-Fi and voice assistant compatibility), advanced energy-saving features, user-friendly programming, and straightforward installation processes.

By weighing factors such as compatibility, connectivity, energy efficiency, programmability, and installation, you can ensure you’re making an informed purchase decision. A well-chosen thermostat will reward you with improved comfort, tangible cost savings, and a streamlined smart home experience. Whether you’re upgrading a single room or outfitting your entire home, the right smart thermostat can transform the way you heatβ€”and live inβ€”your space.

Ready to take the next step? Explore Smart Baseboard Thermostat: EcoNet-BH | WiFi Scheduling, Voice Control, Programmable Electric Baseboard Heaters Thermostat – Grus.io to see if it meet your choice. With the right choice, you’ll enjoy a cozy, connected home that saves you time, money, and energy in the long run.

Posted on Leave a comment

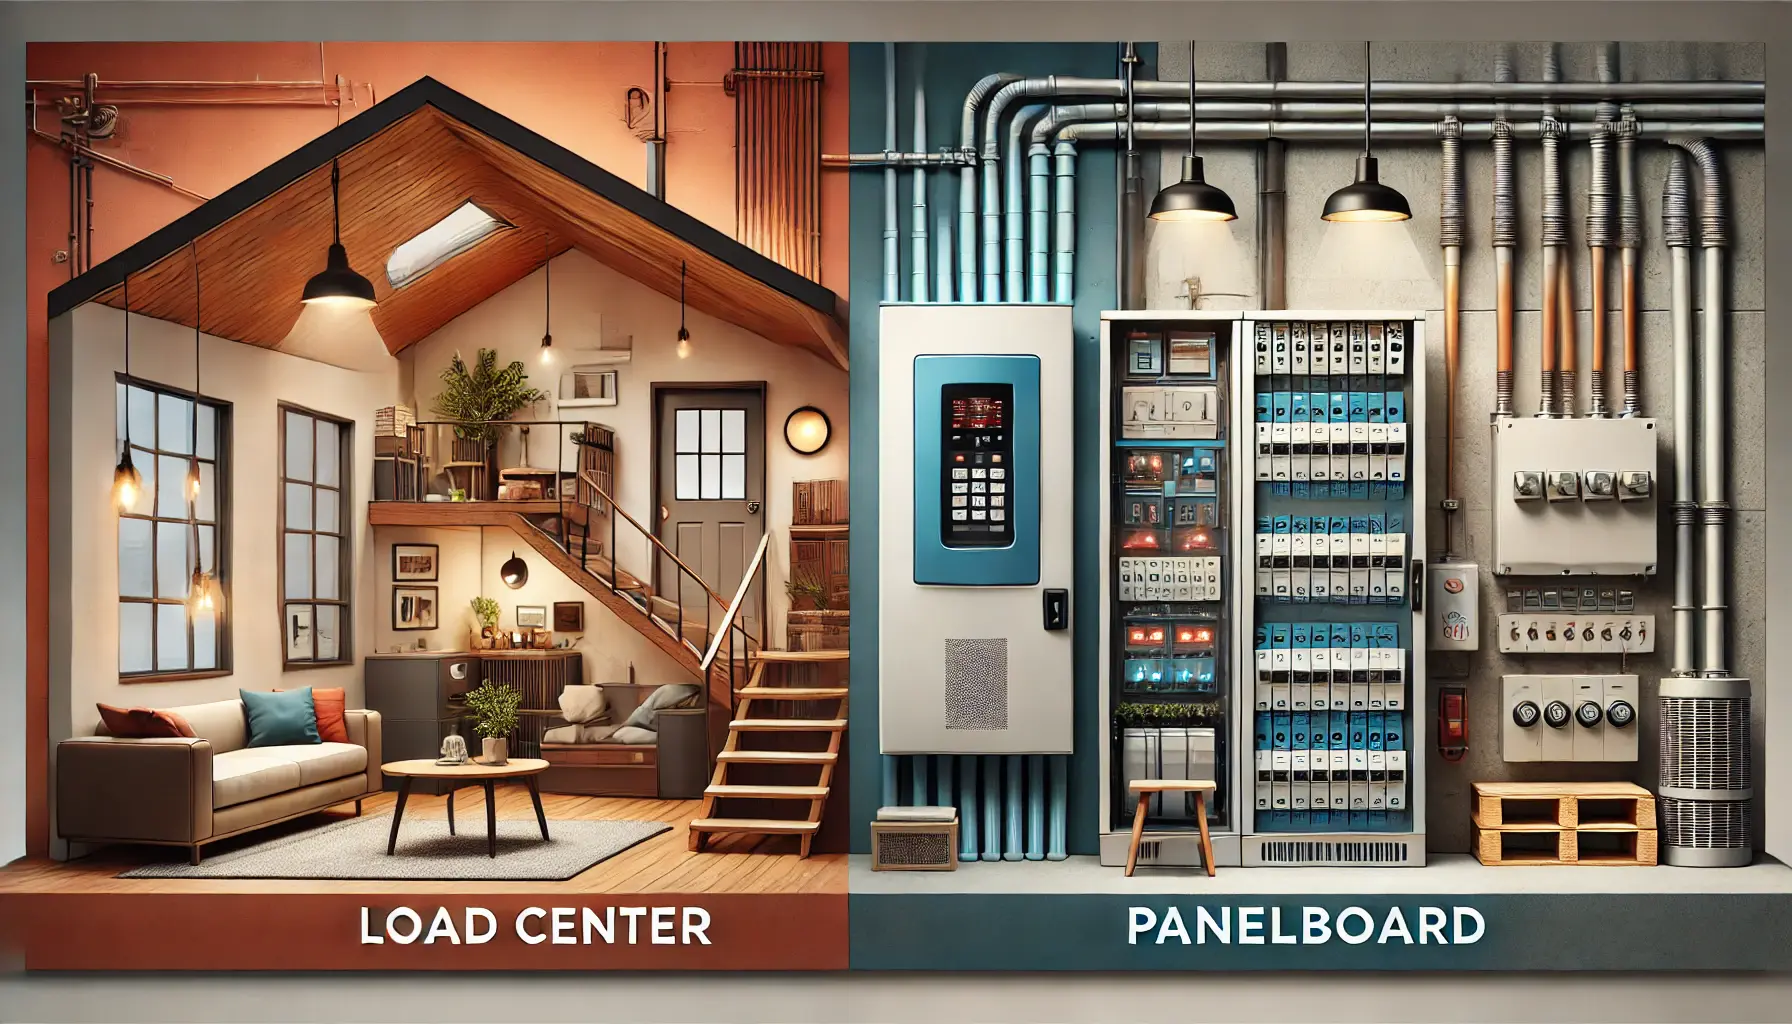
Understanding the Relationship and Differences Between Load Centers vs Panelboards

Load Center vs Panelboard

When discussing electrical power distribution, two key components often come up: Load Centers and Panelboards. These devices, while similar in some functions, serve distinct purposes and are designed for different applications. Known by various names, such as Breaker Box, Distribution Board, or Switchboard, they form the backbone of electrical systems in residential, commercial, and industrial settings.

This article provides a detailed comparison of Load Centers and Panelboards, their structures, functions, and how smart monitoring technologies enhance their performance.


Introduction to Load Centers and Panelboards

Load Centers

image 4 -

A Load Center, commonly referred to as a Breaker Box or Residential Electrical Panel, is primarily used in residential and small commercial applications to distribute power and protect circuits.

Features:

  • Typically installed indoors, such as in garages, basements, or closets.
  • Designed for 120/240V single-phase power systems.
  • Equipped with plug-on breakers for easy installation and maintenance.
  • Maximum current capacity: Usually up to 400 amps.

Panelboards

image 5 -

A Panelboard, also known as a Distribution Board or Electrical Control Panel, is used in commercial and industrial settings where higher voltage and greater capacity are required.

Features:

  • Handles both single-phase and three-phase power systems (120/240V or 208/480V).
  • Equipped with bolt-on breakers, providing a more secure connection for high-load applications.
  • Maximum current capacity: Can exceed 1,200 amps.

Detailed Structural Differences

Core Components

ComponentLoad CenterPanelboard
Main BreakerControls the entire power supply to the home.Handles higher capacity with robust breakers.
Branch Circuit BreakersProtects individual circuits (plug-on type).Supports both plug-on and bolt-on types.
Neutral and Ground BarsConnect to neutral and ground wires to prevent overcurrent.Similar but with higher capacity and more grounding options.
Bus BarsThin copper or aluminum strips for circuit distribution.Larger bus bars to handle higher loads.

Internal Layout Example

image 3 -


Key Differences Between Load Centers and Panelboards

Design and Construction

AspectLoad CenterPanelboard
SizeSmaller, compact for residential use.Larger, modular design for commercial and industrial use.
MountingFlush or surface-mounted on walls.Wall-mounted or standalone in dedicated rooms.
MaterialLightweight metal or plastic casing.Heavy-duty steel or aluminum casing for durability.

Electrical Capacity

AspectLoad CenterPanelboard
Voltage Range120/240V single-phase.120/240V single-phase or 208/480V three-phase.
Current CapacityUp to 400 amps.Can exceed 1,200 amps.

Applications

AspectLoad CenterPanelboard
Primary UseResidential buildings, light commercial.Commercial, industrial, and high-load environments.
Example ScenariosPowering lights, appliances, and HVAC.Managing power for industrial equipment and large offices.

Smart Monitoring Capabilities

With advancements in technology, Load Centers and Panelboards can now be integrated with Energy smart monitoring systems. These systems provide real-time data on power usage, circuit status, and potential issues. And mainly there should be Smart Electric Monitor integrated.

Benefits of Smart Monitoring

  1. Energy Efficiency: Track energy consumption to identify inefficiencies and reduce costs.
  2. Preventive Maintenance: Monitor circuit performance and detect potential overloads or faults before they cause damage.
  3. Remote Control: Use apps or connected devices to control circuits and manage energy use remotely.
  4. Data Analysis: Generate reports to optimize power distribution and plan for upgrades.

How It Works

  • Sensors: Installed on bus bars or breakers to measure voltage, current, and power consumption.
  • Connectivity: Data is transmitted to a central hub via Wi-Fi, Zigbee, or other IoT protocols.
  • User Interface: Accessible through mobile apps or desktop dashboards for real-time insights.

Example Smart Monitoring Solutions

Brand & ModelPhotosFeatureApplications
Grus WattPanel-2XsProvides real-time energy usage tracking and remote Split-phase breaker control. Monitoring 240V Main Load Center and 0 ~ 16 individual circuits .Residential and small business Load Centers
Grus WattPanel-3Xhttps//grusio/wpcontent/uploads/2024/10/3X16bgnonIndustrialEnergyMonitorpngAdvanced diagnostics and predictive maintenance for panelboards. Industrial Energy Advanced Three-Phase Multi-Circuit Monitoring. 208V ~ 400V main load Usage and and 0 ~ 16 individual circuits .Commercial and industrial environments Panelboard.
Grus WattNet-3aSupports multi-panel integration and energy optimization. Three-Phase Smart Electric Meter. Clamp-On CT for Bi-Directional Power Monitoring. No individual circuits.Smaller commercial spaces or light industrial Panelboard.
Grus WattNet-1aSingle Phase Electric Meter. Supports at most 2 circuits. Monitor Bi-Directional Power Meter.Residential and small business circuits.

Real-World Examples and Applications

Residential Example: Load Center

Imagine a standard suburban home with a Load Center installed in the garage. This Load Center distributes power to the home’s lighting circuits, kitchen appliances, HVAC system, and outdoor outlets.

Key Features in Use:

  • Plug-On Breakers: Homeowners can easily add or replace circuits for new appliances, such as an EV charger or a hot tub.
  • 120/240V Distribution: Circuits deliver 120V for standard outlets and lighting, while 240V supports the HVAC system and larger appliances like an electric oven.
  • Smart Monitoring: A Wi-Fi-enabled Load Center allows the homeowner to track energy usage via a smartphone app, enabling better control over energy bills.

Challenges Addressed:

  1. Avoiding overloaded circuits by monitoring real-time usage.
  2. Scheduling appliances to run during off-peak energy rates.
  3. Detecting and addressing circuit faults remotely.

Commercial Example: Panelboard

Consider a small manufacturing facility using a Panelboard to distribute power to various production lines, lighting systems, and administrative offices.

Key Features in Use:

  • Bolt-On Breakers: Ensure secure connections for high-vibration environments like motorized equipment.
  • Three-Phase Power: Supports high-efficiency power distribution to heavy machinery.
  • Modular Design: Allows for future expansion by adding new circuits as production lines grow.

Challenges Addressed:

  1. Balancing power loads across multiple machines to prevent downtime.
  2. Using smart monitoring to predict and prevent equipment failures.
  3. Supporting energy audits for compliance and cost-saving initiatives.

Advanced Smart Features for Load Centers and Panelboards

As power systems become more sophisticated, manufacturers are integrating advanced smart technologies into Load Centers and Panelboards. Below are some key innovations.

1. Circuit-Level Monitoring

Smart Load Centers and Panelboards allow users to track power consumption at the circuit level. This feature provides:

  • Detailed energy usage reports.
  • Identification of energy-hungry devices.
  • Insights for optimizing load distribution.

2. Predictive Maintenance

Using AI and machine learning, smart systems can:

  • Detect patterns in power usage that indicate potential equipment failures.
  • Send alerts for preventive maintenance before issues escalate.
  • Reduce downtime by scheduling maintenance proactively.

3. Renewable Energy Integration

Modern systems can integrate with renewable energy sources like solar panels and wind turbines, allowing users to:

  • Monitor energy production and consumption in real-time.
  • Prioritize the use of renewable energy to reduce reliance on the grid.
  • Store excess energy in battery systems for later use.

Choosing Between Load Centers and Panelboards

Key Factors to Consider

FactorLoad CenterPanelboard
Voltage RequirementsFor 120/240V single-phase systems.For 120/240V single-phase or 208/480V three-phase systems.
Load CapacityUp to 400 amps.Can exceed 1,200 amps.
Installation LocationResidential or light commercial settings.Commercial, industrial, or high-load environments.
Smart FeaturesBasic energy tracking and remote control.Advanced diagnostics, energy optimization, and predictive maintenance.

Example Scenarios

  1. For a Homeowner
    • A Load Center is the best choice for managing standard home circuits, especially with smart monitoring features that allow energy tracking and remote breaker control.
  2. For a Small Business
    • A Panelboard offers greater flexibility for powering office equipment, lighting, and HVAC systems, with the ability to expand as the business grows.
  3. For an Industrial Facility
    • A high-capacity Panelboard with smart monitoring ensures reliability for critical equipment and reduces downtime with predictive maintenance.

Conclusion

Load Centers and Panelboards are both integral to modern electrical systems, but they serve different needs based on capacity, functionality, and application. Load Centers excel in residential settings, offering simplicity, affordability, and the ability to handle basic power distribution. Panelboards, on the other hand, are designed for commercial and industrial use, providing higher capacity, modularity, and robust features.

The integration of smart monitoring technology has further enhanced both devices, making them more efficient, reliable, and user-friendly. Whether you’re managing a home, a business, or an industrial facility, understanding these differences ensures you choose the right solution for your power distribution needs.


Frequently Asked Questions (FAQs)

1. Can a Load Center be used in a commercial setting?

Yes, but only in light commercial applications with moderate power requirements. For larger systems, a Panelboard is recommended.

2. How does smart monitoring improve energy efficiency?

Smart monitoring provides real-time data on energy usage, allowing users to optimize load distribution, identify inefficiencies, and reduce costs.

3. Are Load Centers and Panelboards interchangeable?

No. While they share some similarities, Load Centers are tailored for residential use, while Panelboards are designed for higher-capacity commercial and industrial applications.

4. What brands offer smart Load Centers and Panelboards?

  • Load Centers: Schneider Electric, Siemens, Eaton.
  • Panelboards: Eaton Power Xpert, Square D by Schneider Electric.

By understanding the unique roles and capabilities of Load Centers and Panelboards, you can make informed decisions for your electrical system, whether for a home, business, or industrial application.

Posted on Leave a comment

Smart Thermostat Buying Guide: Benefits, Comparisons, and Installation Tips

Smart Thermostat Buying Guide

What is a Smart Thermostat?

A Smart Thermostat is a Wi-Fi-enabled device that records indoor temperature data, learns user habits, and automatically adjusts to the most comfortable temperature settings. It enhances the comfort, efficiency, and sustainability of your home, reducing electricity bills while achieving an eco-friendly, spring-like indoor environment year-round.

**Save Money!** According to the EPA, consumers using Energy Star-certified smart thermostats can save over 8% on heating and cooling energy costs, amounting to about $50 annually.

**Eco-Friendly!** If all temperature-controlled heating and cooling systems in the US achieved this level of energy efficiency, it would offset approximately 13 billion pounds of greenhouse gas emissions.


Benefits of Using a Smart Thermostat

1 Intelligent Learning to Meet User Preferences

Smart thermostats automatically learn your indoor temperature preferences and habits. By analyzing your usage patterns, including preferred temperatures, humidity levels, and schedules, smart thermostats can autonomously adjust to provide optimal comfort without the need for manual input.

2 Automatic Temperature Adjustment for Energy Savings

Smart thermostats adjust temperatures based on user habits, such as lowering the temperature when you’re away or asleep, saving energy.

For example:
During winter, the temperature can be set to 72Β°F when someone is home and automatically adjusted to 60Β°F when unoccupied. In summer, the thermostat may increase to 80Β°F, reducing air conditioning energy consumption by about 3-5%.

3 Local Weather Integration for Optimal Environment

Smart thermostats can connect to local weather forecasts to analyze and adjust indoor settings accordingly. For instance, during fluctuating weather, a connected thermostat can ensure you wake up comfortable regardless of external conditions. (Feature availability depends on the model.)

4 Automated Management for the Best Comfort

These thermostats can control devices like heaters, air conditioners, and humidifiers for a truly automated experience, adjusting not just temperature but also humidity levels. (Feature availability depends on the model.)

5 Remote Control Capability

Smart thermostats allow remote control via apps, tablets, or computers, letting you manage your home’s temperature from anywhere.


Programmable Thermostats vs. Smart Thermostats

Thermostats can be categorized as Programmable Thermostats and Smart Thermostats. Here’s a comparison:

TypeSmart ThermostatProgrammable Thermostat
FunctionalityLearns user habits and adjusts automatically for comfort and savingsRequires manual programming for preferred schedules
Network ConnectionWi-Fi-enabledNot available
Intelligent LearningVaries by modelNot available
Automatic AdjustmentYesNo
Manual Temperature SettingYesYes
GeofencingYesNo
Energy EfficiencySuperiorStandard
Energy Star CertificationYesCertification stopped in 2009
Rebates AvailableYesNo
Remote ControlYesNo
ConvenienceHighStandard
FlexibilityHighStandard
Voice ControlYes (varies by model)No
HVAC CompatibilityVaries by modelHigh compatibility
PriceHigherLower

**Why Did Energy Star Stop Certifying Programmable Thermostats?** Although programmable thermostats offer energy-saving benefits, their manual setup can be too complex for many users, resulting in underutilization. Energy Star discontinued certification in 2009. A 2015 study found that 40% of users did not use the programming feature, reducing its intended efficiency.

**What is HVAC?** HVAC stands for Heating, Ventilation, and Air Conditioning. In the US, most homes have independent systems for heating and cooling. Heat pump systems typically have outdoor units for heat exchange and indoor air handlers for distribution. Smart thermostats replace traditional temperature controllers to manage these systems.


Key Considerations When Choosing a Smart Thermostat

1 Compatibility with Your HVAC System

While most smart thermostats are compatible with common HVAC systems, not all support every type. Check compatibility before purchase.

For example, the Nest Thermostat E doesn’t support two-stage heat pump systems, but the Nest Learning Thermostat does.

Tips:

  • If your heating and cooling systems are independent, you’ll need a thermostat for each.
  • Many manufacturers, such as Nest, offer online tools to test compatibility.

2 Wiring Considerations

Before buying, check the wiring behind your existing thermostat to determine compatibility. There are three main thermostat wiring systems:

  • Low Voltage (24V, most common)
  • High Voltage (110-240V)
  • Millivolt Systems (very low voltage)

Low Voltage Systems

The most common system uses thin copper wires of varying colors.

  • Most smart thermostats are designed for low voltage systems.
image -

Low Voltage System (Image from Nest)

High Voltage Systems

High voltage systems typically have 2-4 thicker wires in red and black, with markings like 110 VAC, 115 VAC, or 240 VAC. These systems often require professional installation for safety.

  • Few smart thermostats support high voltage systems.
image 1 -

High Voltage System (Image from Nest)

Millivolt Systems

Typically found in wall or floor heaters powered by gas rather than electricity. These systems use even lower voltage than low voltage systems.

image 2 -

Millivolt System (Image from Nest)

3 Presence of a C Wire

A C wire (common wire) provides continuous power to smart thermostats. Check if your HVAC system has a C wire when inspecting your current thermostat.

If no C wire is present, options include:

  • Choosing brands that don’t require a C wire (e.g., Nest, Emerson).
  • Selecting models with power adapters or extenders (e.g., Ecobee).
  • Installing third-party adapters.
  • Hiring a professional to install a C wire.

Smart Thermostat Brand Comparison

BrandLearningRemote ControlManual SchedulingGeofencingRemote SensorAmazon AlexaApple HomeKitWarrantyC Wire
NestYesYesYesYesYesYesNo2 yearsUsually not required
EcobeeNoYesYesYesYesYes (selected models)Yes3 yearsComes with adapter
HoneywellVaries by modelYesYesYesNoYesYes1 yearVaries by model
Grus (EcoNet-TU)YesYesYesYesYesYesYes3 yearsComes with adapter

Common Questions About Smart Thermostat Installation

  1. How can I ensure compatibility with my HVAC system?
    Use the online compatibility tools provided by the thermostat manufacturer.
  2. What should I check before installation?
  • Take photos of the existing thermostat wiring for reference.
  • Turn off the HVAC system’s power supply before removing the old thermostat.
  • Avoid installing the thermostat in direct sunlight for accurate temperature readings.

By following these steps, you can select and install the right smart thermostat for your home, ensuring optimal comfort and energy savings.

Posted on Leave a comment

US mode Smart Heat Pump Thermostats and Standard Thermostats Key Interface DifferencesΒ 

US Mode Smart Heat Pump Thermostats

In the US, smart heat pump thermostats and standard thermostats differ significantly in terms of the devices they interface with and the methods of connection. These differences arise from the distinct operating principles of heat pump systems and traditional HVAC (heating, ventilation, and air conditioning) systems. Below is a detailed comparison of their interfacing devices and connection methods.


1. Devices Controlled by Heat Pump Thermostats

Heat pump systems are dual-purpose, highly efficient devices used for both heating and cooling. Their unique requirements determine the interface methods of heat pump thermostats.

Common Heat Pump Devices

Outdoor Unit (Heat Exchanger)

    • Responsible for heat transfer and connected via specialized cables.
    • The thermostat must support automatic switching between heating and cooling modes.

    Auxiliary Heat Devices (e.g., Electric Heat Strips)

      • Used during extreme cold when heat pump efficiency decreases.
      • Heat pump thermostats require an “Emergency Heat” function to control these auxiliary devices.

      Reversing Valve

        • Controls the switch between heating and cooling modes.
        • Thermostats must support O/B terminals to manage the reversing valve logic (heating default or cooling default).

        Fan (Air Handler)

          • Ensures proper air circulation and is controlled via the G terminal.

          Connection Methods

          Terminal NameFunctionHeat Pump-Specific Usage
          RPower (24VAC)Shared with standard thermostats
          CCommon wire (for powering smart devices)Shared with standard thermostats
          Y1/Y2Compressor control (Stage 1/Stage 2)Used for both heating and cooling
          O/BReversing valve controlSpecific to heat pumps for mode switching
          GFan controlShared with standard thermostats
          E/AUXAuxiliary heat controlSpecific to heat pumps for emergency heating

          2. Devices Controlled by Standard Thermostats

          Standard thermostats are typically used for traditional HVAC systems, such as furnaces and air conditioners. These systems do not include reversing valves or auxiliary heat devices, resulting in simpler connection methods.

          Common HVAC Devices

          Furnace

            • Provides heating, typically powered by gas or electricity.
            • The thermostat controls the heating process via the W terminal.

            Air Conditioner

              • Provides cooling, powered by a compressor.
              • Controlled by the Y terminal for cooling cycles.

              Fan

                • Circulates air, using the same G terminal as heat pump systems.

                Connection Methods

                Terminal NameFunctionHVAC-Specific Usage
                RPower (24VAC)Shared with heat pump thermostats
                CCommon wire (for powering smart devices)Shared with heat pump thermostats
                Y1/Y2Compressor control (Stage 1/Stage 2)Used only for cooling
                W1/W2Furnace heating controlSpecific to HVAC systems
                GFan controlShared with heat pump thermostats

                3. How Smart Thermostats Accommodate Both Systems

                Auto-Detection Features

                Most smart thermostats, such as the Nest Thermostat and Ecobee Smart Thermostat, support both heat pump and HVAC systems. They can automatically detect the type of system based on the wiring configuration.

                • Grus Thermostat: Supports O/B terminal logic configuration and automatically recognizes the reversing valve setup for heat pumps.
                • Ecobee Thermostat: Supports up to 4 heating stages and 2 cooling stages, allowing it to manage both heat pumps and auxiliary heating.

                Installation Considerations

                1. System Type Identification: Choose a smart thermostat compatible with your heating/cooling system (heat pump or HVAC).
                2. Wiring Requirements: Ensure existing wiring includes necessary terminals (e.g., C wire) to power smart features.
                3. Reversing Valve Configuration: For heat pump systems, configure the O/B terminal manually or via automatic detection.

                4. Use Case Comparison Between Heat Pump and Standard HVAC Thermostats

                FeatureHeat Pump ThermostatStandard Thermostat
                Primary PurposeHeating and cooling via heat transferHeating or cooling via heat/cool generation
                Applicable SystemsHeat pump systems (with auxiliary heating)Gas furnace, electric furnace, AC systems
                Auxiliary Heat SupportSupported (via E or AUX terminals)Not supported
                Reversing Valve ControlRequires O/B terminalNot required
                Smart CompatibilitySmart heat pump thermostats (e.g., Nest, Ecobee)Smart HVAC thermostats (e.g., Honeywell, Sensi)

                5. Why Choose a Smart Heat Pump Thermostat

                Wider Compatibility

                  • Supports reversing valves, auxiliary heating, fans, and other functions, making it ideal for complex heat pump systems.
                  • Also compatible with standard HVAC systems, ensuring flexibility for future upgrades.

                  Energy Optimization

                    • Smart thermostats optimize efficiency by learning user habits, scheduling operations, and monitoring energy consumption.
                    • Features like Eco mode reduce heating and cooling costs.

                    Remote Control and Smart Integration

                      • Whether for heat pump or HVAC systems, smart thermostats offer remote control, voice commands, and automation settings, making home temperature management effortless.

                      By understanding the differences in devices and interface methods between heat pump and standard HVAC thermostats, you can make an informed decision when choosing the right thermostat for your system. Ensuring compatibility and proper wiring will guarantee optimal performance and a comfortable home environment.

                      Posted on Leave a comment

                      The Differences and Connections Between Smart Thermostats and Heat Pump Thermostats

                      Smart Thermostats vs Heat Pump Thermostats

                      Smart thermostats and heat pump thermostats are critical tools in modern home temperature regulation. While they share some similarities, their functionality and use cases differ significantly. In this article, we’ll explore how these devices differ, their key features, and how they complement each other in creating an efficient and comfortable home environment.


                      What is a Smart Thermostat?

                      A smart thermostat is an advanced home thermostat designed to automate and optimize home temperature settings using modern technology. Smart thermostats connect to Wi-Fi, allowing homeowners to control them remotely via a smartphone app or voice assistant.

                      Key Features of Smart Thermostats

                      1. Wi-Fi Connectivity
                      • Devices like the Nest Thermostat or Honeywell Thermostat offer app-based control over home heating and cooling.
                      • Wireless Smart Thermostats eliminate the need for physical access to the unit.
                      1. Energy Efficiency
                      • Smart thermostats analyze usage patterns to recommend optimal settings, saving energy and reducing utility bills.
                      1. Remote Sensors
                      • Models like the Sensi Thermostat and Thermostats with Remote Sensors ensure accurate temperature adjustments for specific rooms.
                      1. Smart Home Integration
                      • Compatible with systems like Amazon Alexa, Google Assistant, and Apple HomeKit, making them integral to smart home thermostat setups.

                      What is a Heat Pump Thermostat?

                      A heat pump thermostat is specifically designed to control heat pumps, which are systems that provide both heating and cooling by transferring heat rather than generating it. Unlike regular thermostats, these are optimized for the unique operational needs of heat pumps.

                      Key Features of Heat Pump Thermostats

                      1. Heating and Cooling Support
                      • Heat pump thermostats work seamlessly with systems that need to switch between heating and cooling modes automatically.
                      1. Emergency Heat Mode
                      • These thermostats include backup settings to engage auxiliary heating during extreme cold conditions, ensuring consistent comfort.
                      1. Optimized for Efficiency
                      • The best smart thermostat for heat pumps, such as the Nest Thermostat, minimizes energy consumption while maximizing comfort.

                      Smart Thermostats vs. Heat Pump Thermostats

                      FeatureSmart ThermostatHeat Pump Thermostat
                      PurposeGeneral home heating and coolingSpecific to heat pump systems
                      Energy EfficiencyOptimized for overall energy savingsSpecialized for heat pump efficiency
                      ConnectivityIncludes Wi-Fi and smart home integrationMay or may not include smart features
                      Backup HeatingNot specifically designed for auxiliary heatSupports emergency heating modes for heat pumps
                      Remote SensorsAvailable in advanced models (e.g., thermostat with sensors)Rarely includes remote sensors
                      Best ModelsNest, Honeywell, SensiNest, Ecobee, Carrier

                      How Smart Thermostats and Heat Pump Thermostats Complement Each Other

                      1. Integrated Control

                      Many smart thermostats, such as the Nest Thermostat or Honeywell Wi-Fi Thermostat, are compatible with heat pump systems. This means homeowners can enjoy the smart features of remote control, scheduling, and energy tracking while leveraging the efficient operation of heat pumps.

                      2. Enhanced Comfort

                      Smart thermostats with remote sensors ensure that temperatures are consistent throughout the home, complementing heat pumps by addressing uneven heating or cooling.

                      3. Energy Optimization

                      When paired with a heat pump, smart thermostats can analyze energy use patterns to fine-tune operation schedules, maximizing efficiency and minimizing utility costs.

                      Other Types of Thermostats and Their Roles

                      Thermostatic Radiator Valves

                      • Designed for water-based heating systems, these valves control the flow of hot water to radiators, ensuring room-specific temperature adjustments.
                      • Ideal for homes with radiators but not typically compatible with heat pumps.

                      Electric Baseboard Heater Thermostats

                      • These thermostats are specialized for electric baseboard heaters, providing precise control of electric heating systems.
                      • While efficient for individual rooms, they don’t integrate with central systems like heat pumps.

                      Furnace Thermostats

                      • Common in homes with gas or oil furnaces, these thermostats control traditional heating systems.
                      • Unlike heat pump thermostats, they don’t support cooling functions.

                      Water Heater Thermostats

                      • Built specifically for water heaters, these thermostats regulate water temperature but have no role in air temperature control.

                      Choosing the Right Thermostat

                      When deciding on a thermostat, consider the specific needs of your home and heating system:

                      SystemRecommended Thermostat
                      Heat Pump SystemBest smart thermostat for heat pumps (e.g., Nest)
                      Smart Home SetupWireless smart thermostat with Wi-Fi (e.g., Sensi)
                      Electric Baseboard HeatersElectric baseboard heater thermostat
                      Radiator Heating SystemThermostatic radiator valves
                      Furnace SystemFurnace thermostat (e.g., Honeywell)

                      Top Thermostat Recommendations

                      1. Nest Thermostat

                      • Best for: Smart home integration and heat pump compatibility.
                      • Features: Remote control, energy-saving scheduling, and multi-platform support.

                      2. Honeywell Wi-Fi Thermostat

                      • Best for: Budget-friendly smart home thermostats.
                      • Features: Wi-Fi connectivity and simple app-based control.

                      3. Sensi Thermostat

                      • Best for: Easy installation and energy tracking.
                      • Features: Remote sensors and detailed energy reports.

                      4. Ecobee Smart Thermostat

                      • Best for: Advanced features and compatibility with multiple systems.
                      • Features: Built-in Alexa, remote sensors, and support for heat pumps.

                      Both smart thermostats and heat pump thermostats play vital roles in modern home temperature management. While a smart thermostat offers connectivity, energy savings, and advanced features, a heat pump thermostat ensures the efficient operation of heat pump systems. Combining the two can create a powerful, integrated solution for a comfortable and energy-efficient home.

                      Whether you’re looking to upgrade your existing thermostat or invest in a new heat pump system, understanding the differences and connections between these devices will help you make the best choice for your home.

                      Posted on Leave a comment

                      C-Wire Adapter for Smart Thermostats Installation: What It Is and Why You Need One

                      Thermostat C-Wire Adapter (Common Wire)

                      1. What is a C-Wire Adapter?

                      As smart thermostats become increasingly popular in households, more and more users are looking to upgrade to smart thermostats to achieve more efficient energy management and convenient control. However, many users encounter a common issue during installation: the lack of a C-Wire (Common Wire).

                      The C-Wire is essential for running smart thermostats, as it provides a continuous power supply to support advanced features such as Wi-Fi connectivity, touch screen displays, and learning algorithms. Traditional HVAC (Heating, Ventilation, and Air Conditioning) or heat pump systems often lack a C-Wire, forcing users to seek alternative solutions when upgrading to smart thermostats.

                      The C-Wire Adapter was developed to address this problem. It works by redistributing existing HVAC wiring to create a virtual C-Wire, providing stable power to smart thermostats without the need for complicated rewiring or expensive equipment replacements.

                      2. Functions of the C-Wire

                      FunctionDescription
                      Provides Continuous PowerThe C-Wire delivers a constant 24VAC power supply to smart thermostats to support their core functions.
                      Supports Advanced FeaturesSmart thermostats rely on the C-Wire for features like Wi-Fi, touch screens, remote control, and learning algorithms, which traditional thermostats do not require.

                      Without a C-Wire, systems often resort to “power stealing,” which intermittently draws power from the R-Wire or other control lines. This can lead to unstable power supply, affecting the performance of smart thermostats. For example, the device might lose its connection to Wi-Fi or respond sluggishly to commands.

                      3. Applications of the C-Wire Adapter

                      The C-Wire Adapter is an ideal device for resolving the lack of a C-Wire in HVAC systems. By adjusting the existing wiring, it simulates the function of a C-Wire to ensure proper operation of smart thermostats. Common applications include:

                      3.1. Providing Power for Smart Thermostats

                      • Smart thermostats require a low current, continuous power supply, which cannot be delivered by traditional R (power) and W (heating control) wires.
                      • The adapter reconfigures existing wires (e.g., G or Y wires) to supply an equivalent C-Wire power source.

                      3.2. Compatibility with Legacy Systems

                      • Many older HVAC systems and heat pumps do not have a dedicated C-Wire connection, complicating upgrades to smart thermostats.
                      • The C-Wire Adapter ensures compatibility with these systems, avoiding costly rewiring or equipment replacement.

                      3.3. Simplifying Installation

                      • Traditional rewiring may involve cutting walls, adding wires, or reconfiguring the HVAC control board.
                      • Using a C-Wire Adapter achieves the C-Wire function quickly, saving time and labor.

                      4. How a C-Wire Adapter Works

                      C-Wire Adapters work by redistributing existing wiring or extending the HVAC control interface to create a virtual C-Wire, providing power to smart thermostats. Key working methods include:

                      4.1. Reusing the G-Wire (Fan Control Wire)

                      • Reconfigures the G-Wire as a C-Wire while maintaining fan control through hardware or software.
                      • Advantages: No additional wiring required; compatible with most systems.
                      • Considerations: May require adjustments to fan control logic.

                      4.2. Parallel Power Supply

                      • Splits power from the R-Wire (24VAC) and other control wires (e.g., W or Y) to provide a stable low-current supply.
                      • Advantages: Flexible installation, suitable for multi-function HVAC systems.

                      4.3. Dedicated C-Wire Generation

                      • Extends the HVAC control board interface to generate a dedicated C-Wire.
                      • Advantages: Suitable for complex multi-stage heating or cooling systems with stable operation.

                      5. C-Wire Connection Methods

                      5.1. C-Wire and Standard Interface Logic

                      TerminalFunction DescriptionConnection Logic
                      R (Power)Supplies 24VAC powerConnect R to the thermostat’s R terminal; the C-Wire completes the circuit for power supply.
                      C (Common)Provides continuous powerConnect C to the thermostat’s C terminal to enable advanced features like Wi-Fi.
                      W (Heating)Activates heating systemsConnect W to the heating device; the C-Wire supplies independent power.
                      Y (Cooling)Activates cooling systemsConnect Y to the cooling device; the C-Wire supplies independent power.
                      O/B (Reversing Valve)Switches heat pump modes between heating and coolingConnect O/B to the reversing valve; the C-Wire powers the thermostat.

                      This configuration ensures the C-Wire can deliver stable power to the thermostat while supporting heating, cooling, and fan functions.

                      5.2. Installing a C-Wire Adapter

                      The C-Wire Adapter is typically installed near the HVAC control board (often within the furnace or air handler). It redistributes existing wires to generate a “virtual” C-Wire. Common installation locations include:

                      a. On the HVAC Control Board

                      • The most common location, connected directly to the control board.
                      • Control boards are usually located inside:
                      • Furnaces (gas or electric).
                      • Air handlers (for heat pumps).

                      b. Near the Thermostat

                      • Installed behind or near the thermostat to avoid HVAC equipment disassembly.
                      • Suitable for users with limited tools who prefer a simple installation.

                      c. Standalone Power Modules

                      • If direct HVAC connection is not possible, standalone power modules can plug into a wall outlet to power the thermostat without modifying existing wiring.

                      6. Steps to Install a C-Wire Adapter

                      Grus EcoNet TU C Wire Adapter -

                      6.1. Check for Missing C-Wire

                      • Inspect the HVAC control board and thermostat wiring layout.
                      • If no C-Wire or C terminal is available, proceed with installing a C-Wire Adapter.

                      6.2. Choose a Compatible Adapter

                      • Select a C-Wire Adapter compatible with your HVAC system and smart thermostat brand (e.g., Nest Power Connector, Honeywell C-Wire Adapter, or Grus EcoNet-TU).

                      6.3. Connect the Adapter to the HVAC Control Board

                      Adapter Input TerminalFunction DescriptionConnect to HVAC Control Board
                      RPowerHVAC control board’s R terminal
                      CCommon WireHVAC control board’s C terminal or generated by the adapter
                      WHeating ControlHVAC control board’s W terminal
                      YCooling ControlHVAC control board’s Y terminal
                      GFan ControlMaintain existing fan connection

                      6.4. Connect the Adapter to the Thermostat

                      Adapter Output TerminalFunction DescriptionConnect to Thermostat Terminal
                      WHeating control signal to activate heatingThermostat’s W terminal
                      CCommon Wire to provide continuous powerThermostat’s C terminal
                      SSignal control for special instructionsThermostat’s signal terminal (if supported)
                      RPower (24VAC) to supply the thermostatThermostat’s R terminal

                      6.5. Test the System

                      • Restore HVAC system power and verify the thermostat is functioning correctly.
                      • Test heating, cooling, and fan functions to confirm proper connection.

                      7. Popular C-Wire Adapters Compared

                      BrandFeaturesIdeal Application
                      Grus EcoNet-TUCompatible with multiple brands, supports complex systemsHVAC and heat pump systems, multi-stage heating/cooling
                      Nest Power ConnectorDesigned specifically for Nest thermostats, easy to installSingle-stage heating/cooling systems
                      Honeywell C-Wire AdapterCompact design, ideal for Honeywell smart thermostatsSingle or multi-stage heating/cooling
                      Ecobee Power Extender KitIncluded with Ecobee thermostats, supports advanced functionsMulti-stage heating/cooling, complex HVAC systems

                      The C-Wire Adapter is a convenient solution for creating a C-Wire without requiring rewiring. By selecting the right adapter and following the standard installation process, users can enjoy the full benefits of a smart thermostat with minimal effort. Whether you use Nest, Honeywell, or Ecobee, the right adapter choice and installation can help upgrade your HVAC system to provide a smarter and more efficient home heating and cooling experience.